**These pages are made for only for our farm so it will be easy for us to go and remind ourselves what we need to do.
We collected those files over the years. We are always learning new information. We add and edit these files almost daily.
We collected those files over the years. We are always learning new information. We add and edit these files almost daily.
Kidding Kit
|
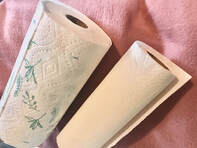
Paper Towels
|
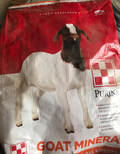
Feed bags
|
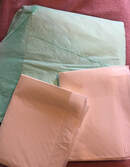
Puppy training pads
|
|
Iodine 7 in the medicine bottle 
|
Dental Floss 
|
Cooler box 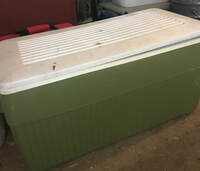
|
|
Molasses 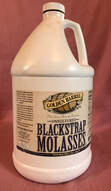
|
Hot water thermos 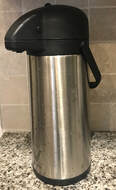
|
Water Bowel 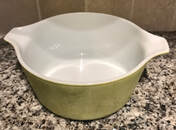
|
|
Bulb Syringe 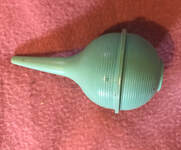
|
Barn Camera 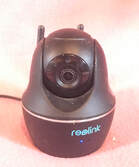
|
Big Syringe |
|
Delivery Notebook & Pen 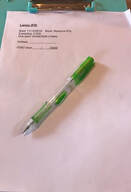
|
Cellphone 
|
Vet & Other goat breeders' contacts |
|
Thermometer 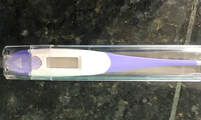
|
Jug of OB lube 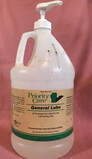
|
Bucket of warm water |
|
Small plastic medicine container 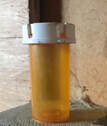
|
Hair Dryer |
Probio & Fortified Vitamine B complex tubes 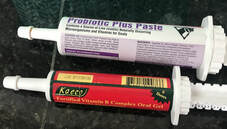
|
|
Garbage bag with a bucket |
Scissors 
|
TUMS 
|
|
Bath towels 
|
Electric Blanket |
Hand Sanitizer 
|
|
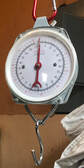
Scale & Reusable bag
|
Clock 
|
Tube feeding 
|

|
Kid Puller 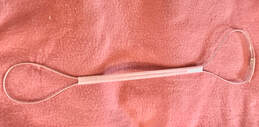
|
Kidding Position Poster 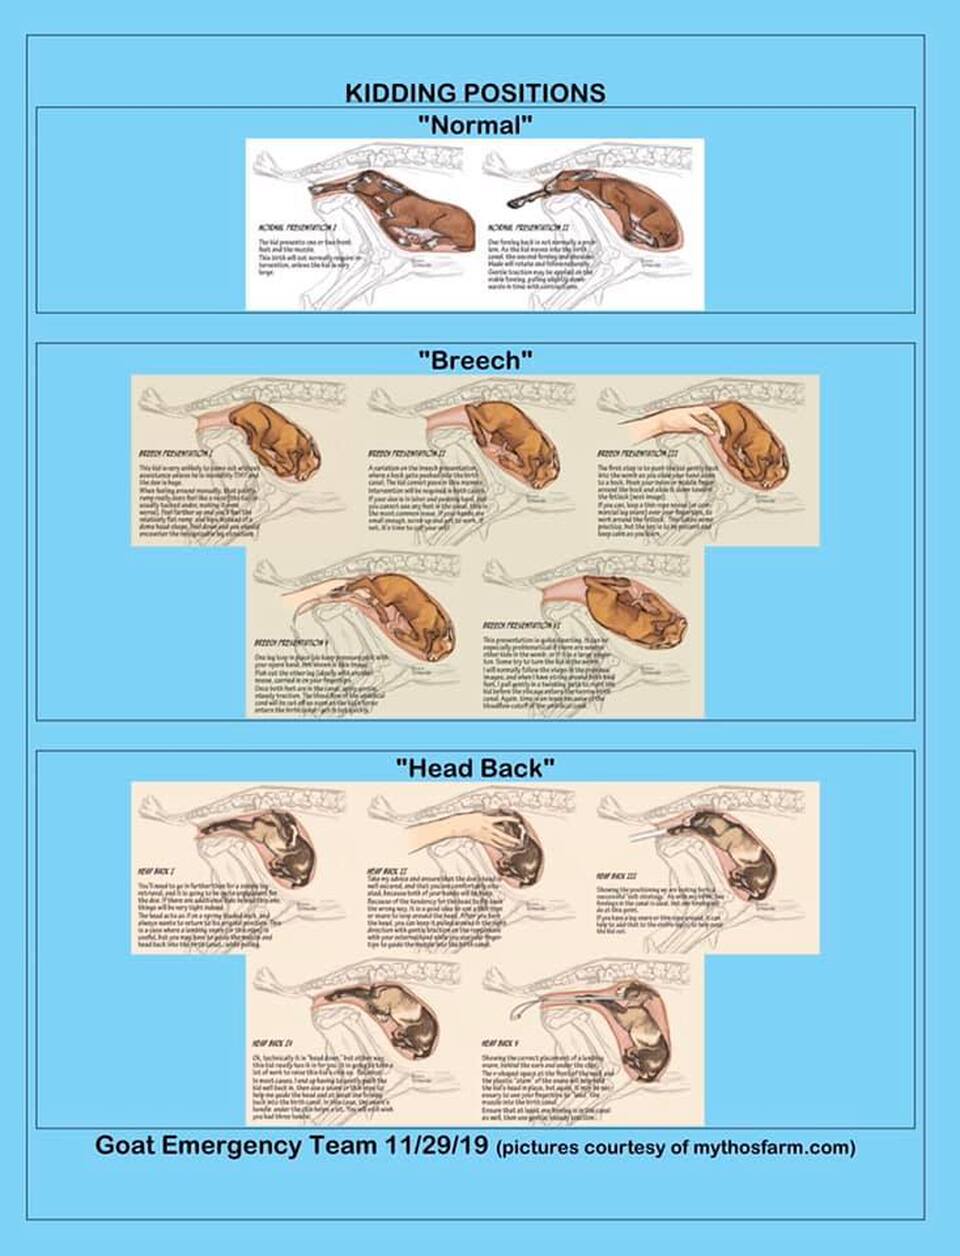
|
Gloves 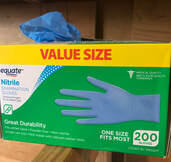
|
|
Honey & Cayenne Pepper mix 
|
Colostrum 
|
Bottle & teats 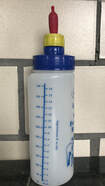
|
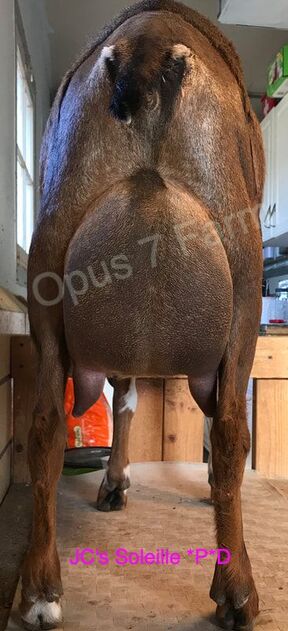
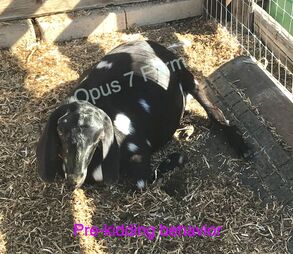
Pre-kidding Shaving idea
We like to clip ladies about a week before their 145th due date. If there is a cold spell coming around that time, we wait until it's gone.
The reasons why we like to do are
1) We can see the changes of their bodies before kidding better.
2) We can keep the udder, tail, and legs cleaner after kidding with afterbirth.
The reasons why we like to do are
1) We can see the changes of their bodies before kidding better.
2) We can keep the udder, tail, and legs cleaner after kidding with afterbirth.

|
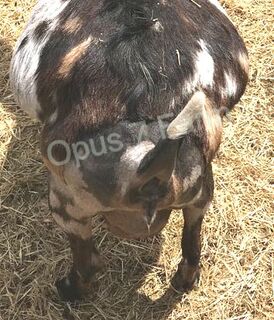
Clipping around the ligament area so you can watch how it changes over several days.
We clip tail hair especially inside so it will be easy to clean. We clip legs as well so afterbirth won't bother them getting caught. We clip foreudder & udder so it will be easy to clean as well as easy for babies to find teats. You can see how we clip backside from this picture very well. Remember, this is just a pre-kidding clip and you are not taking her to the show. So don't worry that their clipping look funny. They won't complain about their haircut! **When we notice the early labor and time to bring the doe to the kidding pen, we spray olive oil around back of the udder and tail area so it gets much easier to clean up the after birth. |
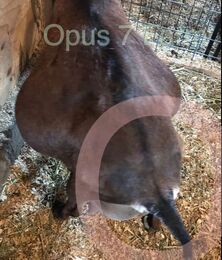
Check the ligament
Kidding Signs Examples
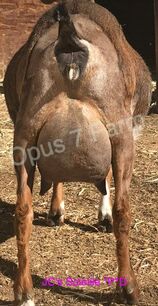
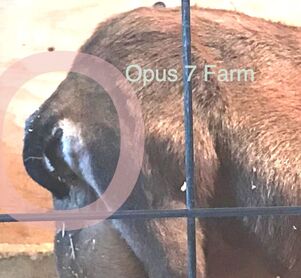
1) Filling up the udder
At our farm, most of our ladies fill up their udders on the day of kidding.
**Not all but lots of ladies' udder will fill up completely full and hard the day they kid.
At our farm, most of our ladies fill up their udders on the day of kidding.
**Not all but lots of ladies' udder will fill up completely full and hard the day they kid.
|
139th day 04/21/2020 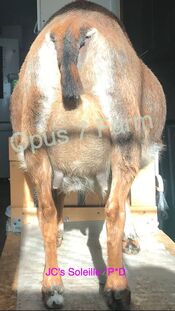
|
143rd day 04/25/2020 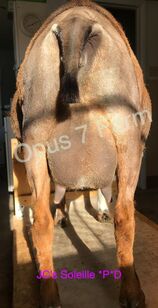
|
|
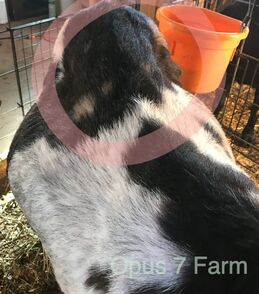
2) Dimples next to spines
The dimples are much more significant. FF will be less obvious than older timers.
The dimples are much more significant. FF will be less obvious than older timers.

|
|
|
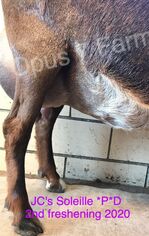
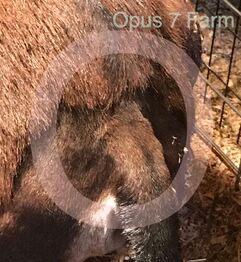
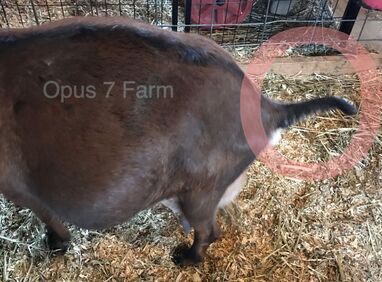
3) Dimples right next to root of the tail
As ligaments disappear around the tail, there will be significant dimples right nest to root of the tail area
As ligaments disappear around the tail, there will be significant dimples right nest to root of the tail area
|
|
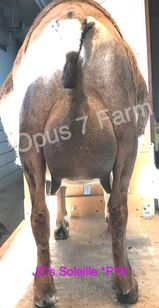
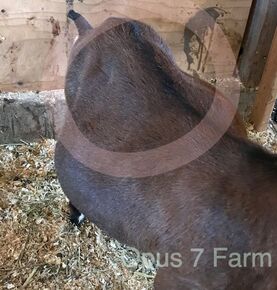
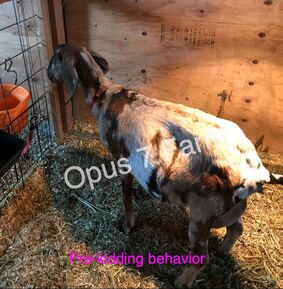
4) Curled up tail
Because her ligaments are almost gone or completely gone, she cannot carry her tail up like usual anymore. You will see this kind of rainbow shaped tail.
Because her ligaments are almost gone or completely gone, she cannot carry her tail up like usual anymore. You will see this kind of rainbow shaped tail.
|
|
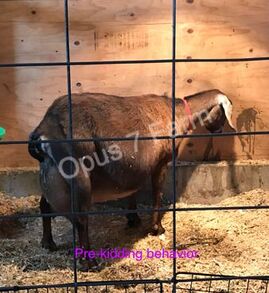
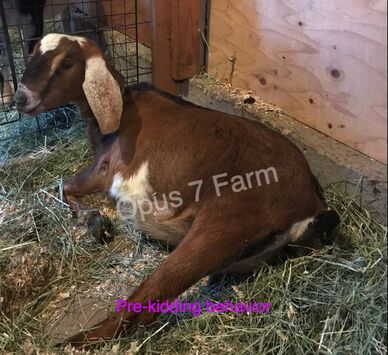
5) Isolation from everyone
She will become very isolated from everyone and concentrate on how she is feeling inside.
When this behavior happened, most likely within 24h, you will meet babies.
She will become very isolated from everyone and concentrate on how she is feeling inside.
When this behavior happened, most likely within 24h, you will meet babies.
|
|
6) Grinding teeth
She is coping with her contractions and pains
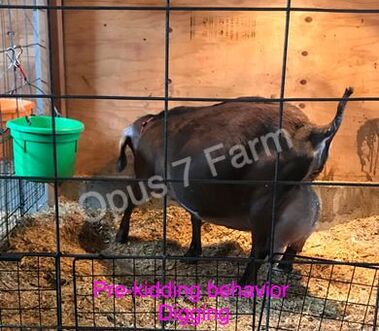
7) Pawing the ground often
She is trying to get the comfortable spot to lay down
8) Standing up facing towards wall for a while and try to lay down again
She is in between of contractions
The real push will start very soon so you need to keep an eye on her.
She is in between of contractions
The real push will start very soon so you need to keep an eye on her.
|
|
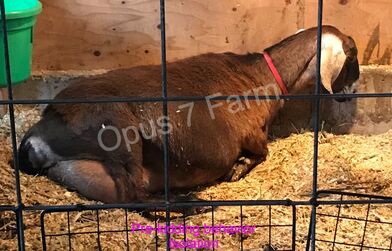
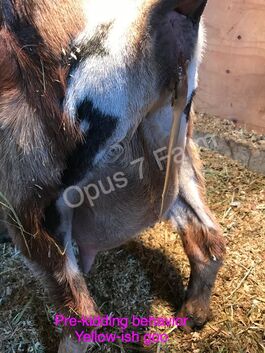
9) Yellow-ish goo is coming out
She will be ready to have real push pretty soon. We usually see our does to lay down like the picture in order to start pushing.
|
|
**After the first serious push, the first baby SHOULD be out within 30 minutes. (You will be able to see something is not working out well within 15 minutes.) If that has not happened, something is not alined nicely. You will need to go inside and check cervix size, the location of the baby, and position of the baby. From there, you most likely need to assist the dam to deliver the baby. More details about assisting, look below.
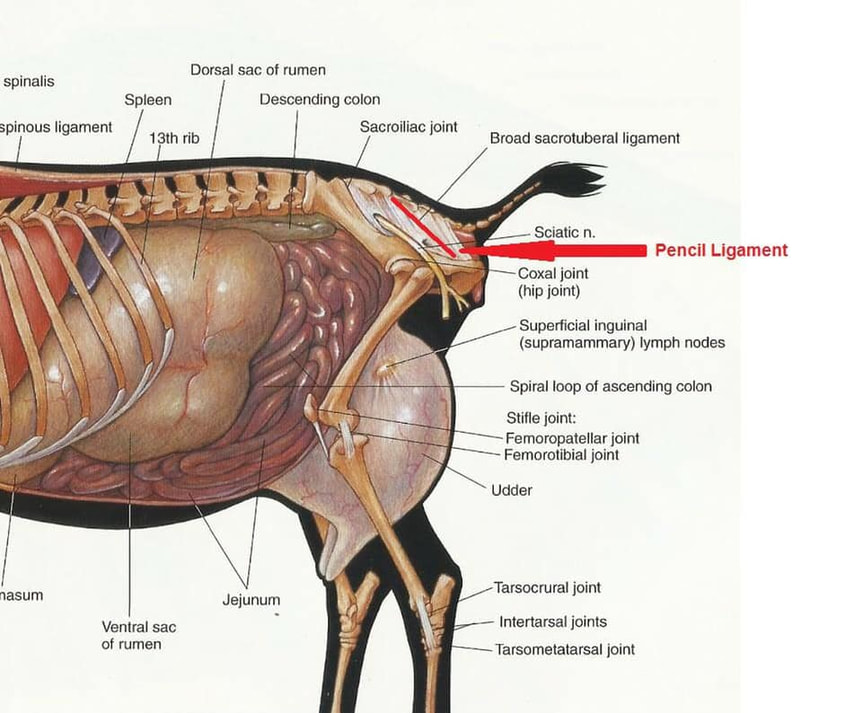
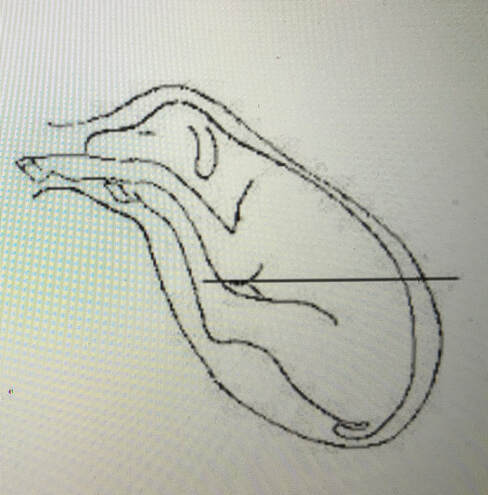
“Scapula” and getting those Head only deliveries out
"Ok, for today’s little Tidbit we will discuss the “Scapula” and getting those Head only deliveries out. I referenced the “Scapula” on my recent Video. If you did not watch it, I suggest you do so this little TidBit makes a bit more sense.
I had a young lady ask me for more detailed information on the Scapula and how to “work” it so you can get a head only kid delivery out.
In the video, I described placing your hand on the babies head and slowly following it down to the spine and off to one side until you feel the scapula. (see diagram attached) then, with your index finger, slowly work that loose skin until you can sorta get your index/middle finger under that scapula. The area you work is toward the back of the scapula. Since the scapula (shoulder blade) is attached the entire leg, the leg should start to move and reposition. Because you are working the back of the scapula, this will cause the leg to pop forward and at that time, you should be able to grab the leg and pull it toward the pelvic brim and finish delivering the baby.
What I suggest is that if you have a young kid on the ground already. Hold that baby and get familiar with the anatomy of the goat. Put your hand on the goats head, work your way down the spine a little and down to the side slightly until you feel the scapula and work it and see how it manipulates the leg.
Do it over and over until you feel comfortable with how the goats anatomy is and how it works.
This technique may not work on every delivery, but it will work on most."
Lube & Delivery, Going in!

Kidding
by Marty Montague
This article explains pretty nicely
by Marty Montague
This article explains pretty nicely
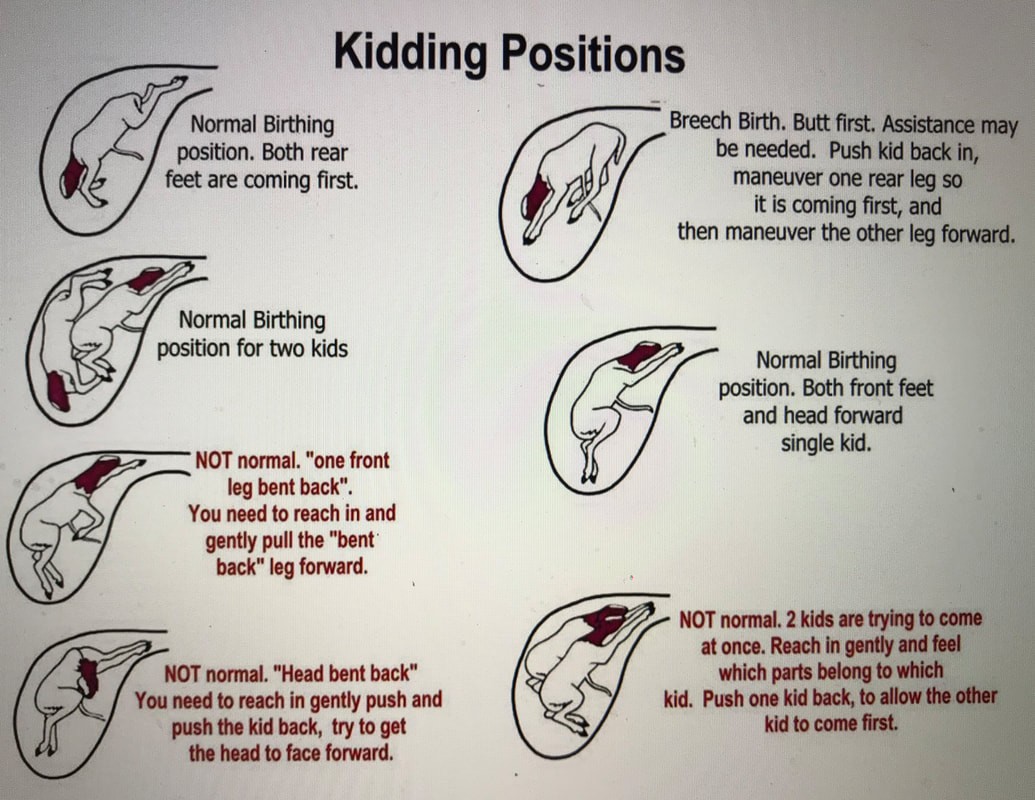
Kidding Positions

Clear pictures

*Kids' Position & Assistance*
- The doe should have delivered her first kid within 30 minutes after her first serious push.
- Pull only when the doe pushes.
- Pull at a downward angle.
- Wash your hands and arms with a disinfecting cleanser (Betadine Surgical Scrub).
- Clean the back end of the doe.
- Lube up with an proper Lub and a squirt of Betadine
~3 Kidding Stages~
Stage 1
This initial stage can last anywhere from 1 to 8 hours. However, please note that it may last longer in first-time mothers. Stage 1 is often accompanied by one or more of the following symptoms: Uneasiness, kicking at the belly with the hind hooves, pawing the ground (nesting) similar to building a nest area, laying down and getting up frequently in an attempt to get comfortable, frequent attempts to urinate, some vaginal discharge and obvious uterine contractions may or may not be seen. Stage 1 ends when fetal parts enter the vaginal/birth canal. If, after 8 hours of Stage 1 behavior one does not see signs that Stage 2 has commenced, possible intervention/assistance may be warranted.
Stage 2
This second stage of the birthing process may last only 1 to 2 hours. This stage begins with the appearance of the amniotic (water) sac protruding out of the vulva. The fetus’s legs will appear next and will be followed by delivery of the kid. Where multiple births are anticipated, this process will repeat itself about every 15-30 minutes for each kid delivered. The delivery of the last kid is the end of Stage 2. If the doe continues to act like she is pushing and signs that Stage 3 is not occurring, there may be a final fetus that she is having trouble delivering. If this is the case, she may need to have some assistance.
Stage 3
The final stage of parturition can last anywhere from 1 to 3 hours after the final kid is born. This stage is indicated by delivery of the placenta or afterbirth. On occasion the placenta/afterbirth can take up to 24 hours before delivery. Do not pull on it as you will injure the dam! If it’s long and dragging the ground, tie a wet cloth onto it and let gravity take over.
~3 Best positions~
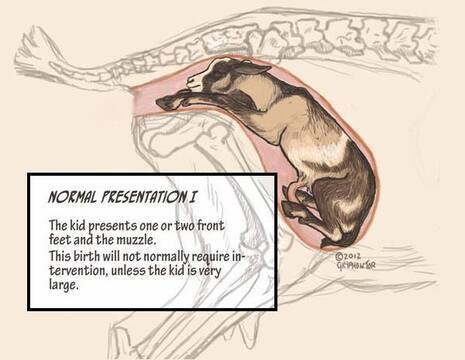
Diving Position
This is a proper position. Most of the time this is what you will encounter for a single baby or the first of twins or triplets. This is what we all want to see.
This is a proper position. Most of the time this is what you will encounter for a single baby or the first of twins or triplets. This is what we all want to see.
|
|
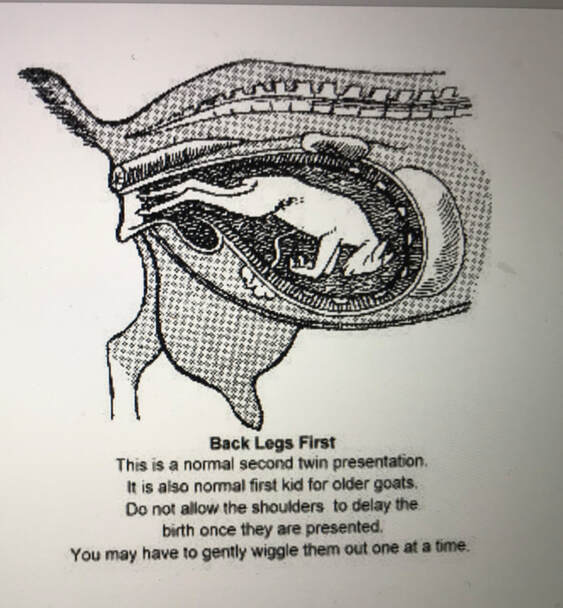
Back leg first position
This position will deliver fine as well. Most important is to support baby as delivered and get head out. This happens usually with twins or multiples, but can happen with one baby.
This guy will need to be rolled over.
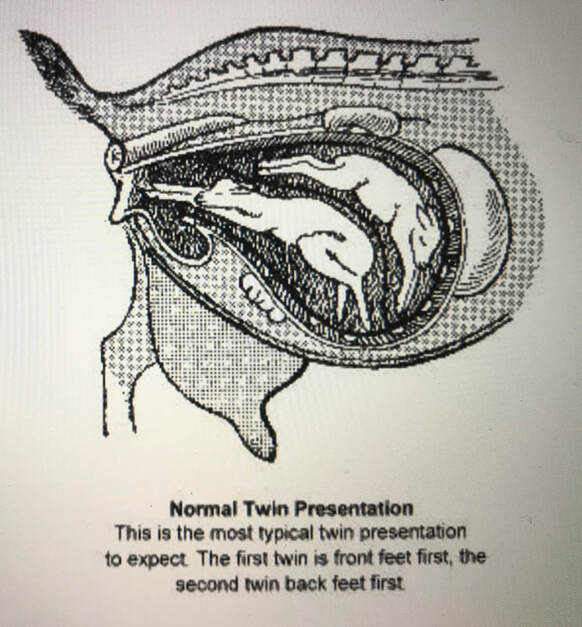
Normal Twin Position
This is the best twin presentation you can ask for. Sometimes the babies come out reversed- meaning the first one is back feet first and the second one is front feet first.
*Hooves U = Back feet
*Hooves Down = Front feet
Unless the entire baby is upside down, which in this case you need to turn baby full around before it is born.
~A little difficult but can be done position~
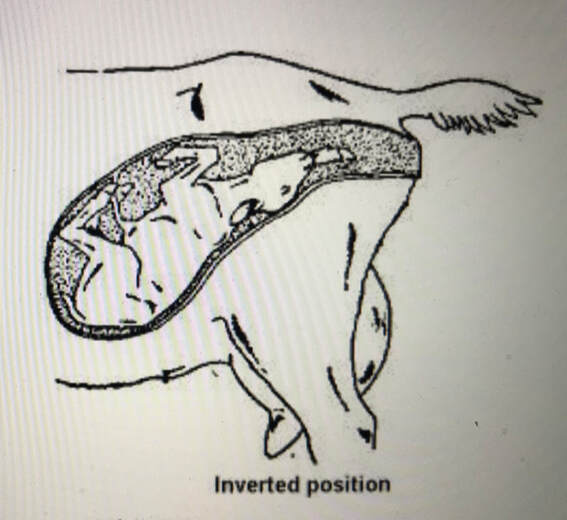
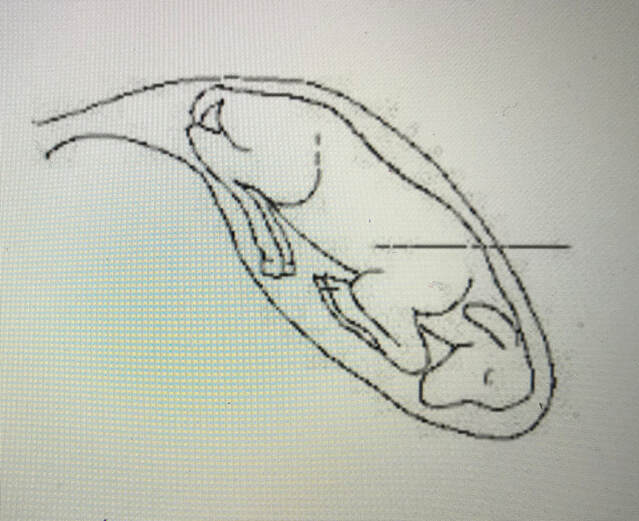
Inverted position
Reaching in you will need to grab shoulder area and in a some what sweeping motion help roll baby over.
**Do not allow him to deliver in this position as the neck and spine would be in danger.
~5 Very difficult Breech positions~
Double Trouble
This birth will NOT happen successfully unless the babies are untangled and could do severe damage to the doe. Calmly push babies back and feel inside to decide which parts belong to which baby. Make absolutely sure you are working with only one baby before you try to deliver it. You may need to feel and follow feet back to the body of the baby and make sure you have the right head as well.

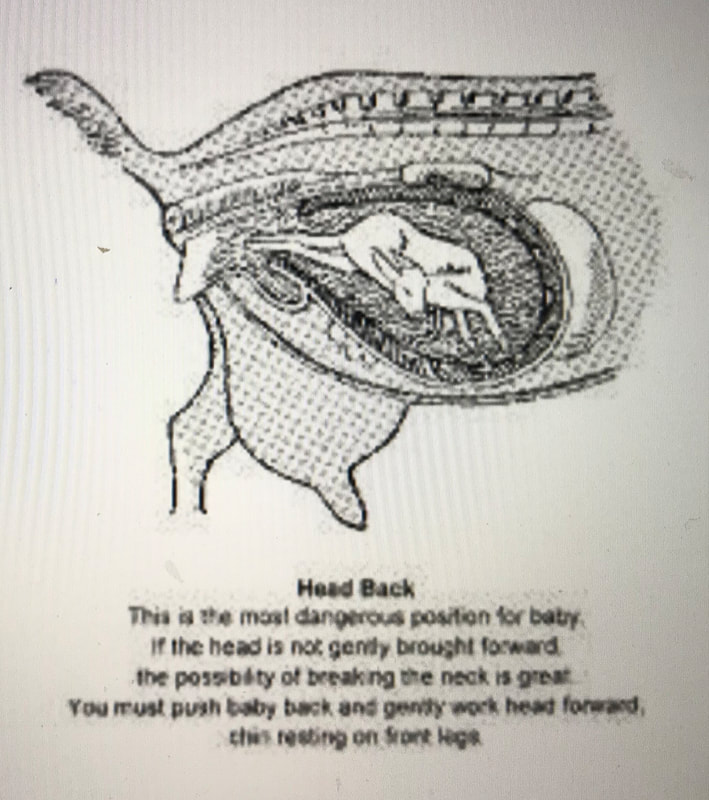
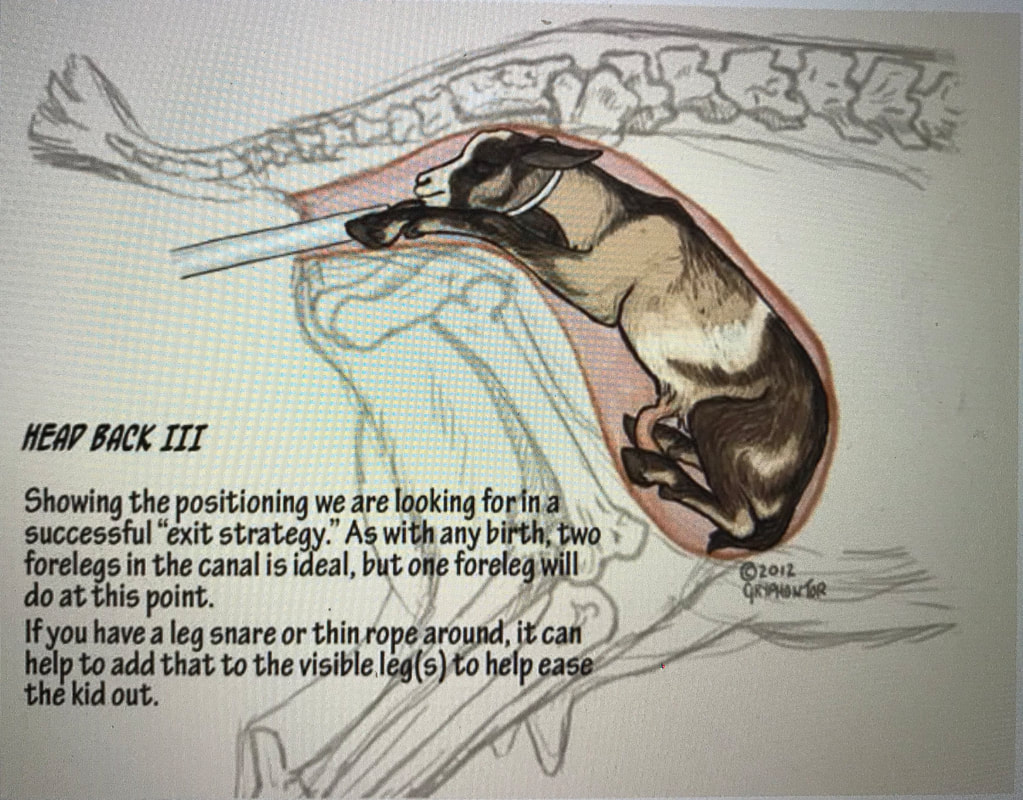
Head back, Chin down Position
Head back or chin down is one of the most difficult positions. The head is like being on a spring loader; you move it in place and it snaps back when you let go. You will need a snare to hold in correct position.
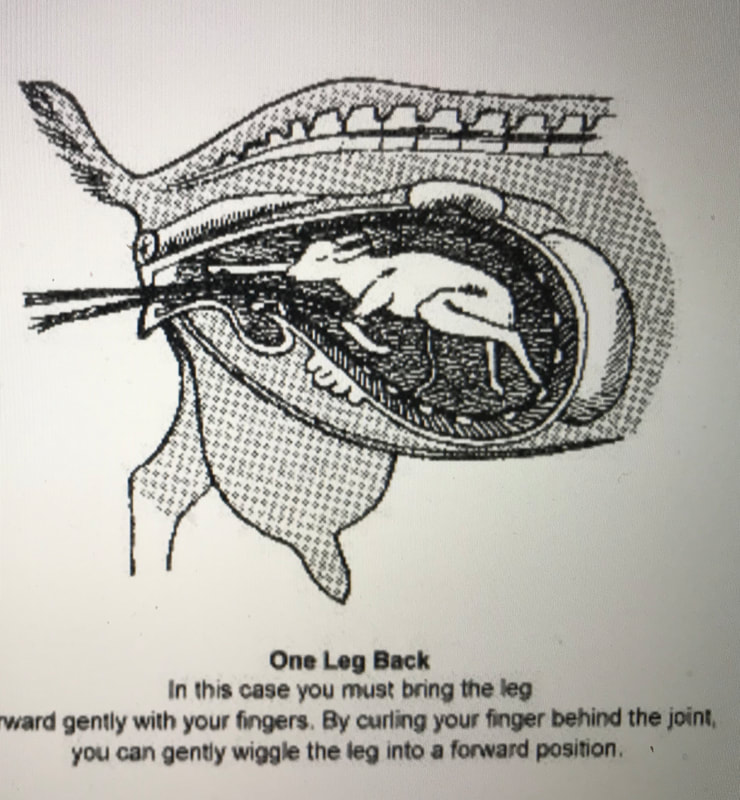
One leg back position
Again, you will need to push baby back a little to work the front leg forward, using your fingers and gently yet firmly wiggle the leg forward with the leg in the "cup" of your hand. Anything you do inside the doe needs to be done very carefully so as not to tear her uterus. Any projecting parts should be kept away from the uterine wall-using the back of your hand toward the uterine wall and working inside your hand works well. "Rope in diagram shows what fingers will be doing."
Example of a Kid Snare.
If you have no experience using, be very careful.
True Breech Position
This is a true breech birth…butt only, no leg presentation.
You will need to fish the feet out. Be careful when reaching in as you cup the hoof of the first leg in your hand and guide it outward. Now reach in again and cup the other foot and guide it out.
You can use feet snare to hold first recovered foot out while you fish the other out. Using a leg snare or small piece of twine to hold one let out while you try to get the second leg out.
Once you get both legs free, help bring baby in the world supporting him as he’s delivered.
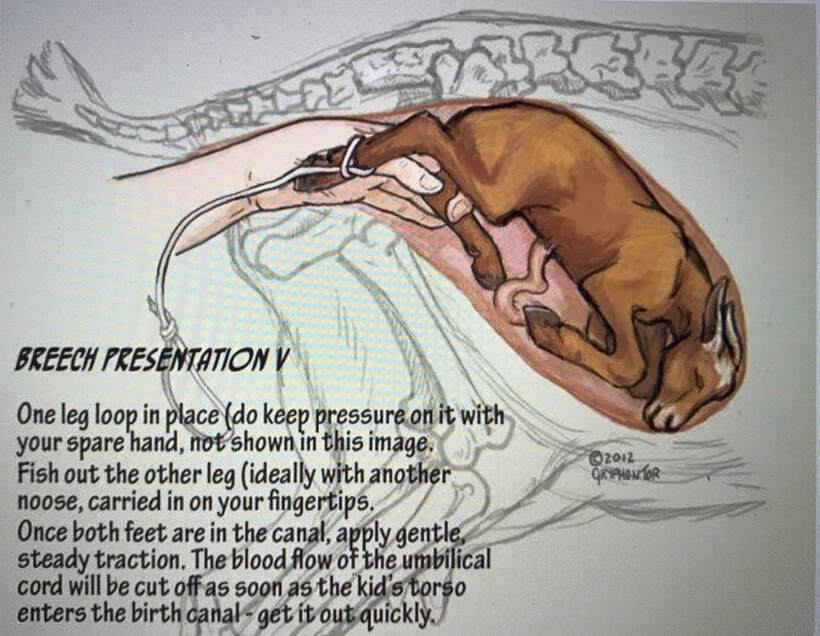
Breech Position #2
This position will be difficult. You will need to stand mom up to make room. When you go inside her, cup the back hoof and push it back, trying to coax it straight back. Repeat with the other back leg. This can be very frightening. Keep your cool and push baby back enough to wiggle the head into a face forward direction. If not, there is a chance of breaking the baby's neck during delivery.
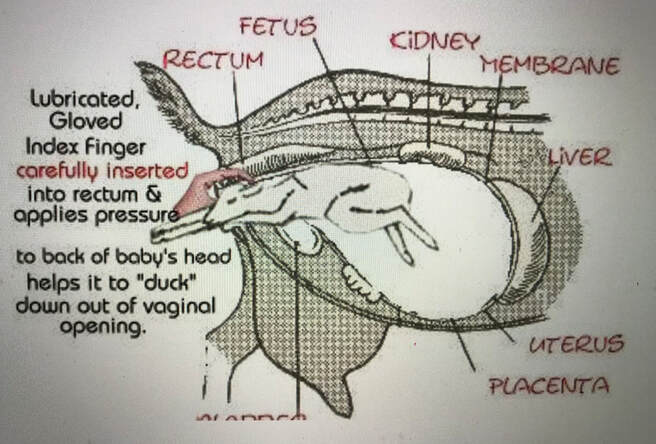
Assisting if head is stuck in the vaginal opening. Work carefully so you don’t tear the inner wall of the rectum. Push with the flat of your finger on the top of babies head, making sure that the tip of your finger is behind the head. You are making the baby “duck” his head down and out.
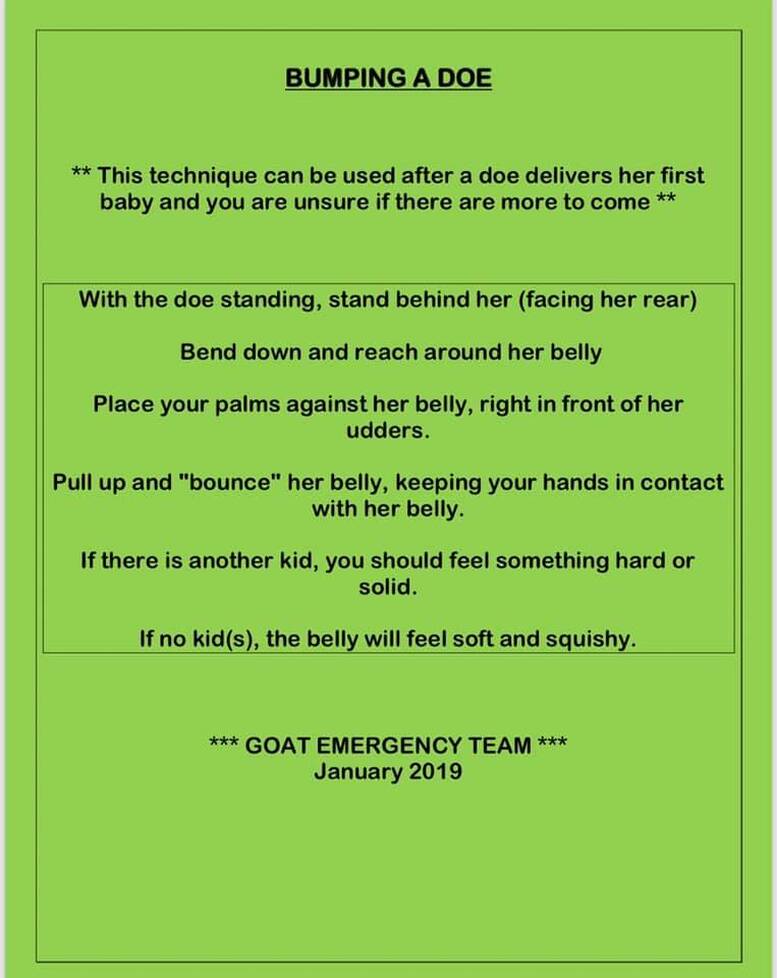
Bumping a doe during kidding